Windows 11 has a feature that allows users to run apps as an administrator. This can be useful for certain programs, but it’s not always desirable for others.
For example, if you’re using a browser other than Microsoft Edge and need to use the built-in ‘Save Page As’ functionality, you’ll want to disable this feature so your file is saved with the correct extension.
In my case, I install XAMPP on a partition that is not OS’s drive so I need to run XAMPP as administrator to start all of its required services.
In this post, we’ll show you how to set any app in Windows 11 to always run as an administrator or never allow it from running as admin depending on your needs.
Table of Contents
Why Use Run as an Administrator for an App?
The following are some reasons why you might want to set an app to always run as an administrator on Windows 11.
- Accessing Administrator-Only Features of Programs – Some programs have special functionality that only administrators can access, and you may need this for certain apps.
- Running an App with Elevated Privileges – Some apps need to run with elevated privileges to perform tasks, and this may be required by certain programs.
How to Set Apps to Always Run as an Administrator
- Open a software’s location.
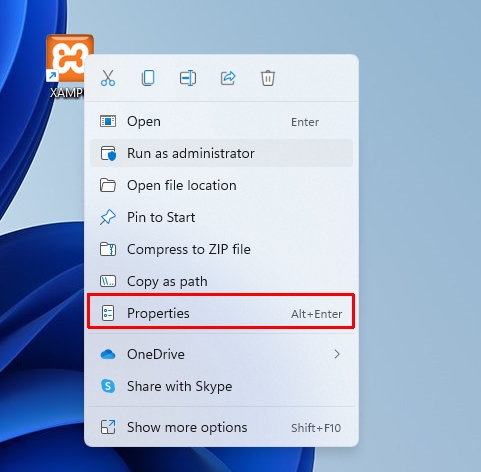
- Right-click on the software’s icon then choose Properties.

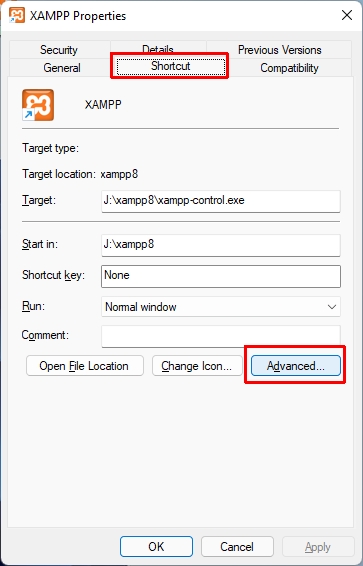
- Switch to the Shortcut tab and click on Advanced… button.

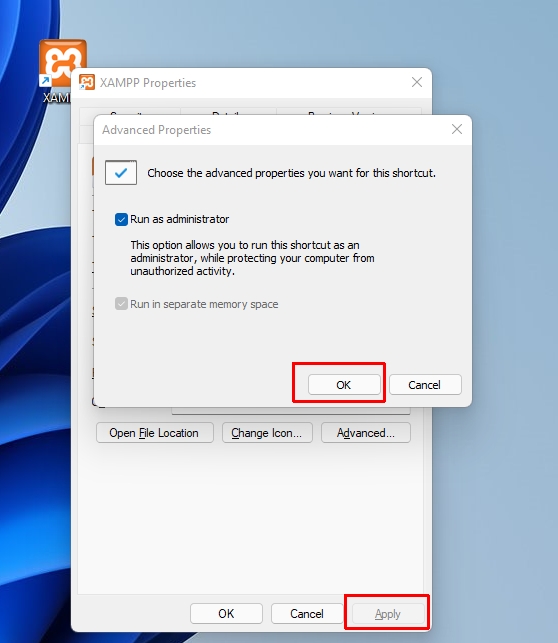
- Check the Run as administrator option.

- Click OK button then Apply button.
Every time you launch the application, it will be run with elevated privileges after you’ve completed the steps.