Windows Defender is the default antivirus tool to protect your PC from viruses, malware, ransomware, and other security threats. Although it is a reliable tool to keep your system safe, there might be some instances where you want to exclude certain files or folders from the Windows Defender scans.
All antiviruses share a common problem, they sometimes recognize the wrong threats and delete your files and folders or block a program from being executed. So, to stop Windows Security from quarantining programs, you can add these files and folders to the exclusions list.
It simply means that you trust a file, file type, folder, or process that Windows Security has detected as malicious.
Table of Contents
Exclude Files and Folders
Excluding files and folders from Windows Defender scans is a simple process that can be done in a few steps.
- Open Windows Security > Virus and threat protection.
- Access Manage settings in Virus and threat protection settings section.
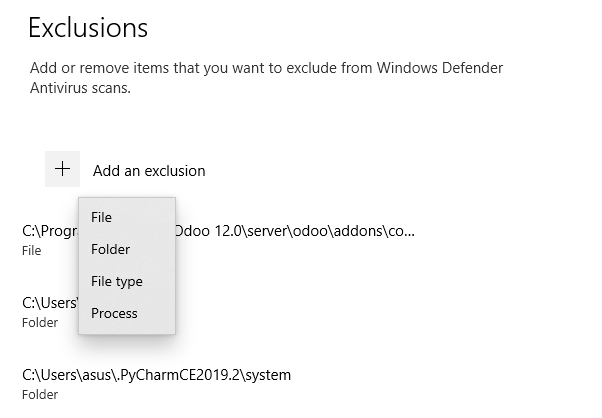
- Scroll down to the Exclusions section then open Add or remove exclusions.
- To add a file/folder, click on Add an exclusion button and choose the type.

Allow a Quarantined File or Threat
Sometimes Windows Defender might flag a file or threat as malicious and quarantine it, even though it might not be harmful. In such cases, you can allow the file or threat by following these steps.
- Open Windows Security > Virus and threat protection.
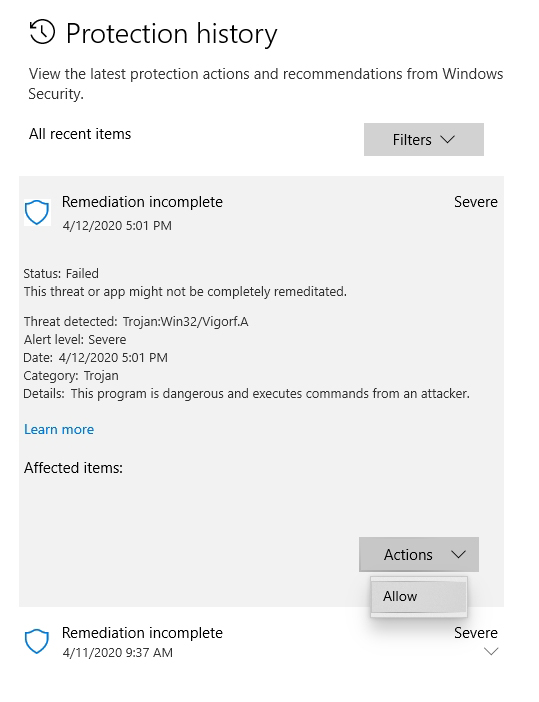
- Access Protection history.
- Browse through the quarantined threat list and expand the one you want to allow.
- Click on Actions > Allow to remove the file from being blocked.

Excluding files and folders from Windows Defender scans is a straightforward process that can be done through the Windows Security app. However, you should only exclude files or folders that you trust and that you know are safe.


